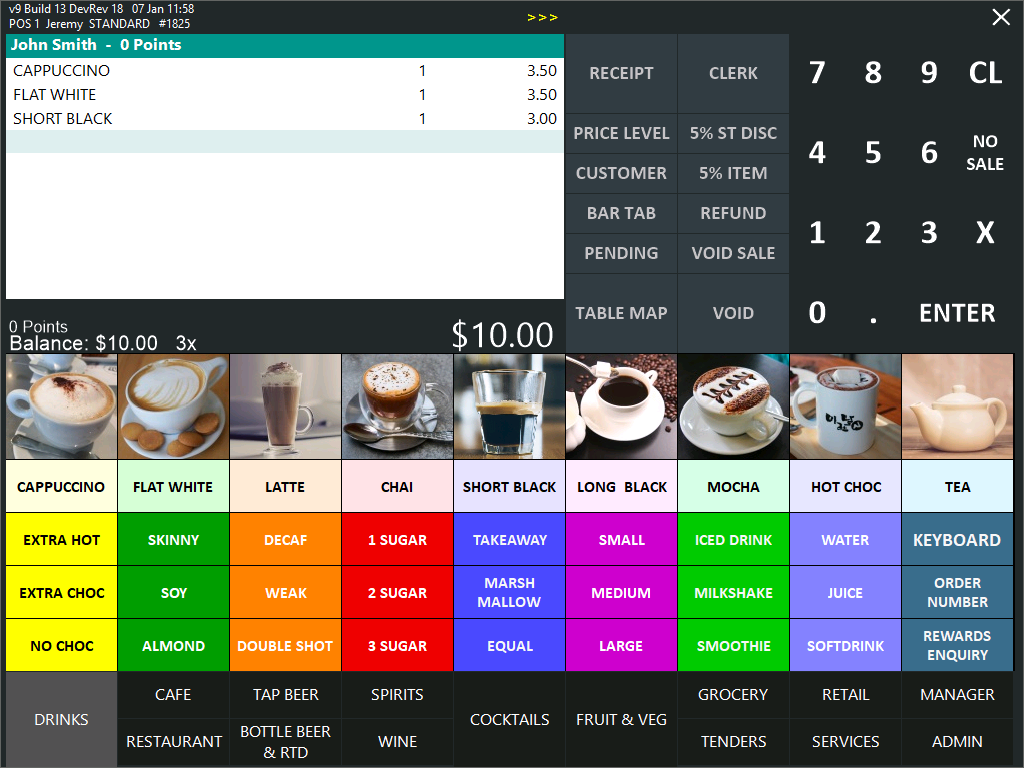
To retrieve a Pending Sale, log in to the sales screen and press the Pending Sale button without adding any items to the sale.
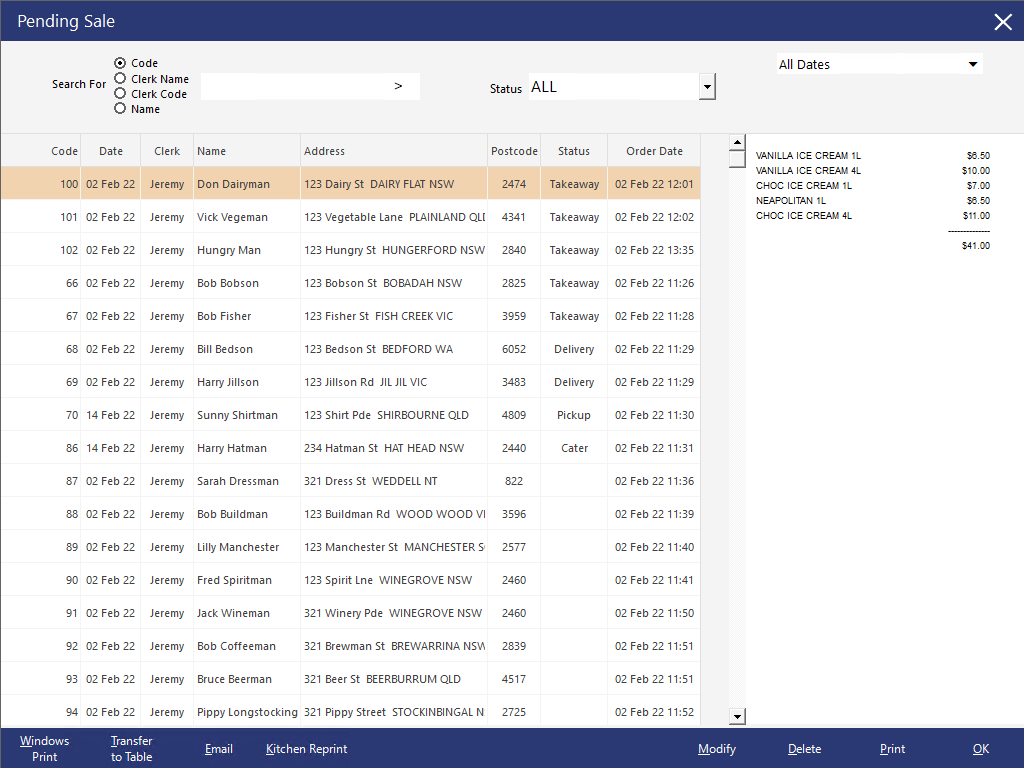
The Pending Sale screen will open and show a list of all the saved sales from all terminals.
You can filter and search for Pending Sales using the following options:
Code - Enter a Pending Sale Code to display any Pending Sales that match the entered code.
Clerk Name - Enter the Clerk Name to view any Pending Sales saved by the entered Clerk Name.
Clerk Code - Enter the Clerk Code to view any Pending Sales saved by the entered Clerk Code.
Name - Enter the Customer Name to view any Pending Sales that contain the entered Customer Name.
Tip!
Each Sales Type Status that is available from the dropdown box is configured via Back Office > Setup > Global Options > Sales > Sale Type Status.
Note that not all Sale Type Statuses need to be configured in Global Options - leave any non-required statuses as blank.
Blank Sales Type Statuses will not be displayed
ALL - This will display all Status types
Status 1 - This will display sales that have a Sales Type Status 1.
Status 2 - This will display sales that have a Sales Type Status 2.
Status 3 - This will display sales that have a Sales Type Status 3.
Status 4 - This will display sales that have a Sales Type Status 4.
Status 5 - This will display sales that have a Sales Type Status 5.
Status 6 - This will display sales that have a Sales Type Status 6.
Status 7 - This will display sales that have a Sales Type Status 7.
Status 8 - This will display sales that have a Sales Type Status 8.
Status 9 - This will display sales that have a Sales Type Status 9.
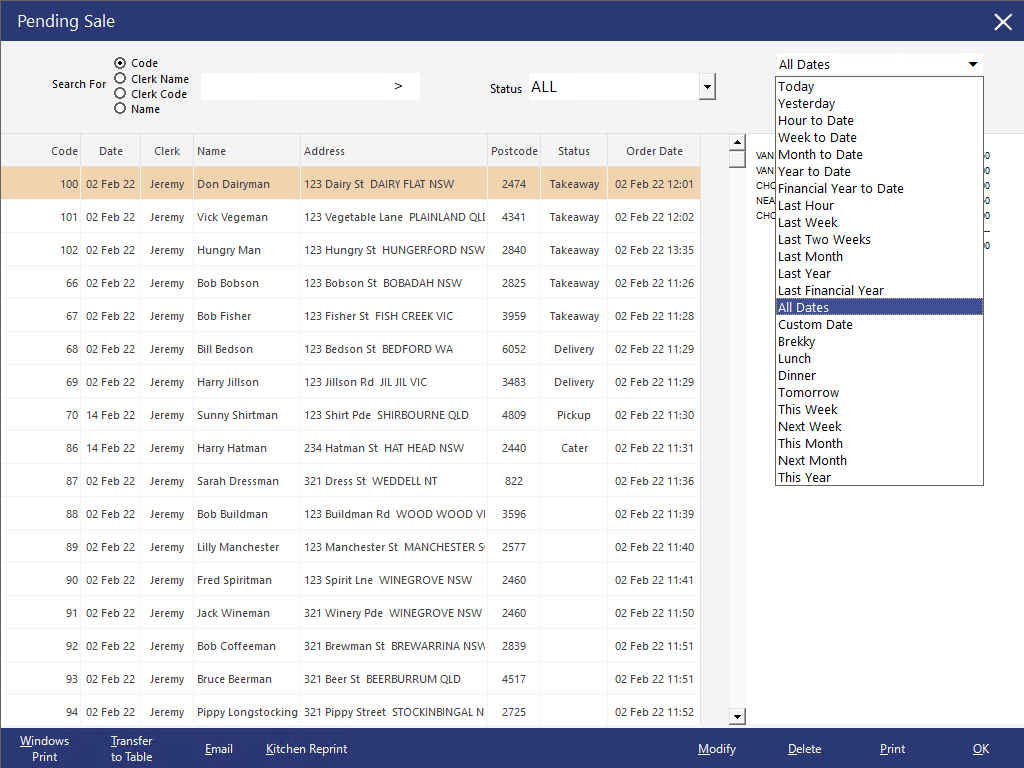
The Date Filter can be used to display Pending Sales that have an Order Date which falls within the range of the selected Date Range.
The following Date Ranges can be selected from the Date Filter dropdown box:
Tip!
The First Day of Week and End of Day Time will determine the date and time range used for the Date Selection dropdown box.
The First Day of Week and End of Day can be configured by going to: Back Office > Setup > Global Options > General > General
The list of pending sales can be sorted by any one of the headings by clicking on the header.
To reverse the sort, simply click on the header again.
Clicking on a pending sale will display its contents on the right hand side.
Once you have found the sale you require, you can perform the following actions using the buttons at the bottom of the screen:
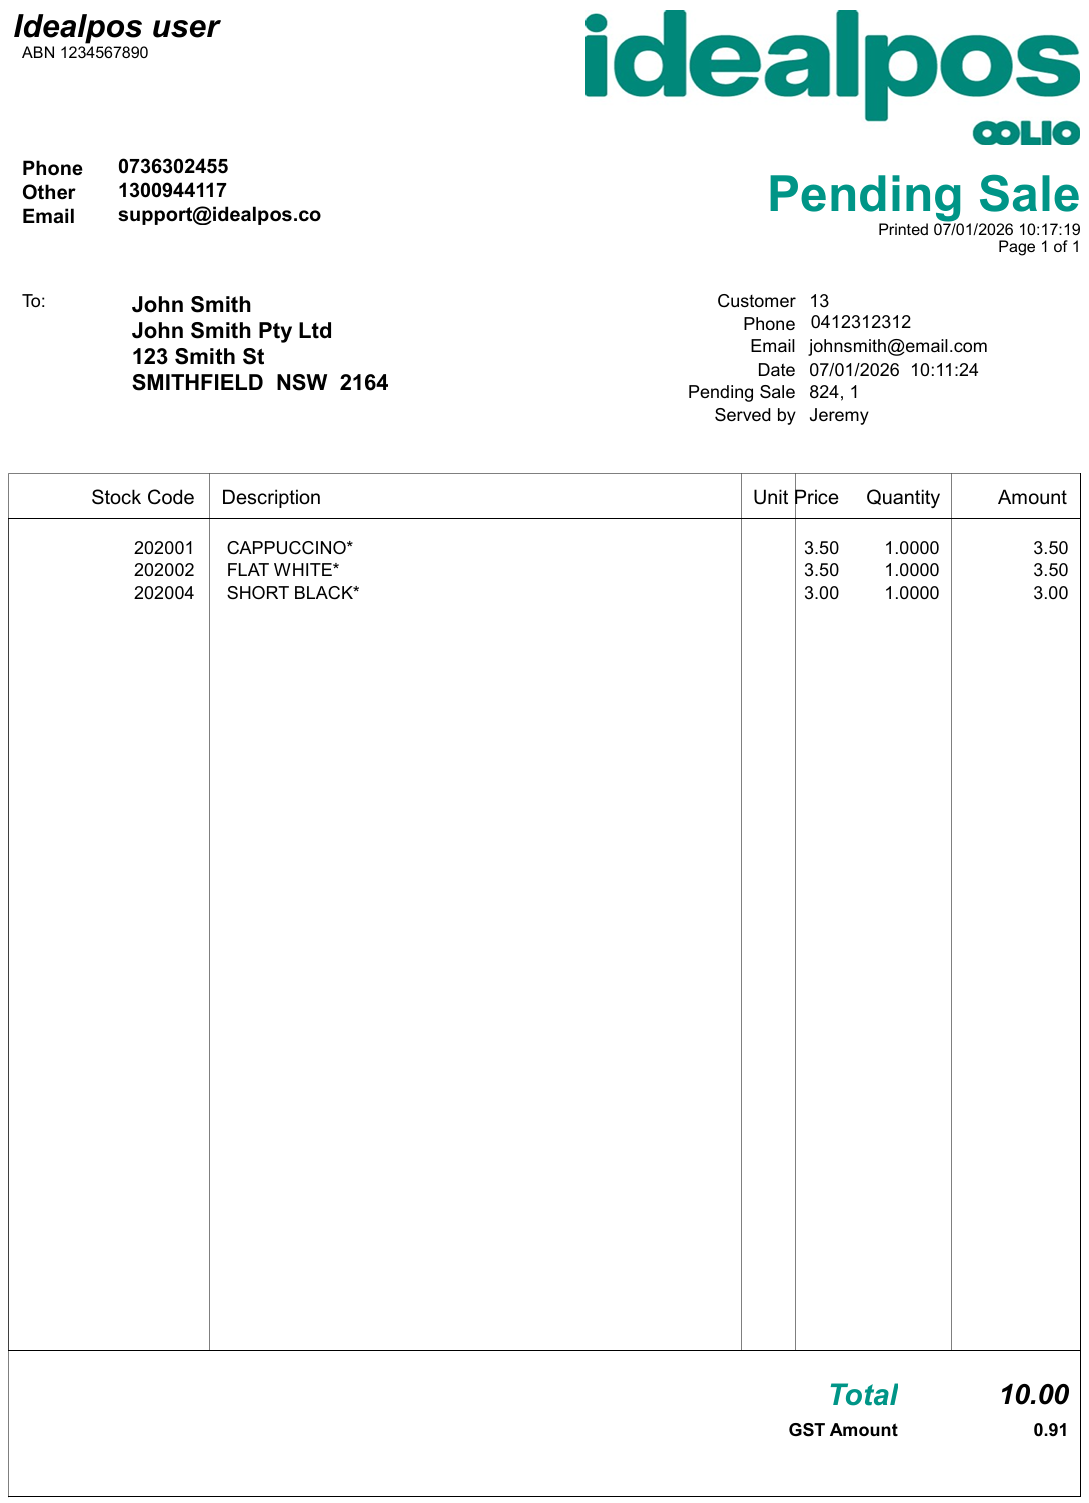
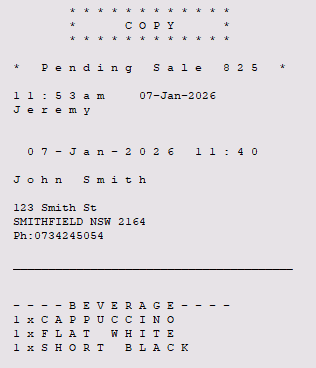
The Windows Print of the Pending Sale will contain the following details:
The below is an example of a Pending Sale
Pressing the Transfer to Table button will trigger a confirmation prompt "Are you sure you wish to Transfer to a Table?".

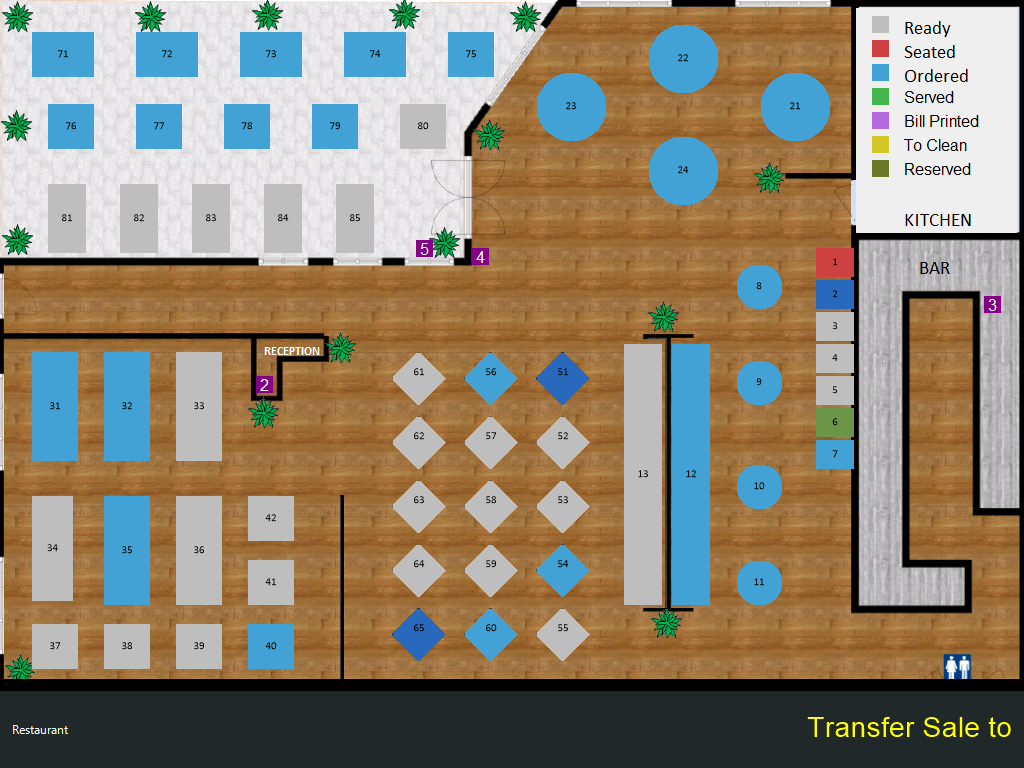
Pressing "Yes" will trigger the Table Map to be displayed, enabling the selection of a table to transfer the Pending Sale to.
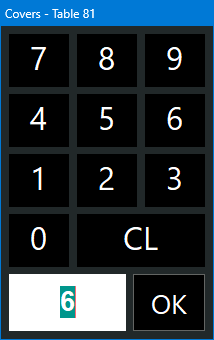
If the Yes/No Option Prompt for Covers is enabled, the Covers prompt will be displayed.
If required, amend the number of covers using the on-screen numeric keypad and press "OK".
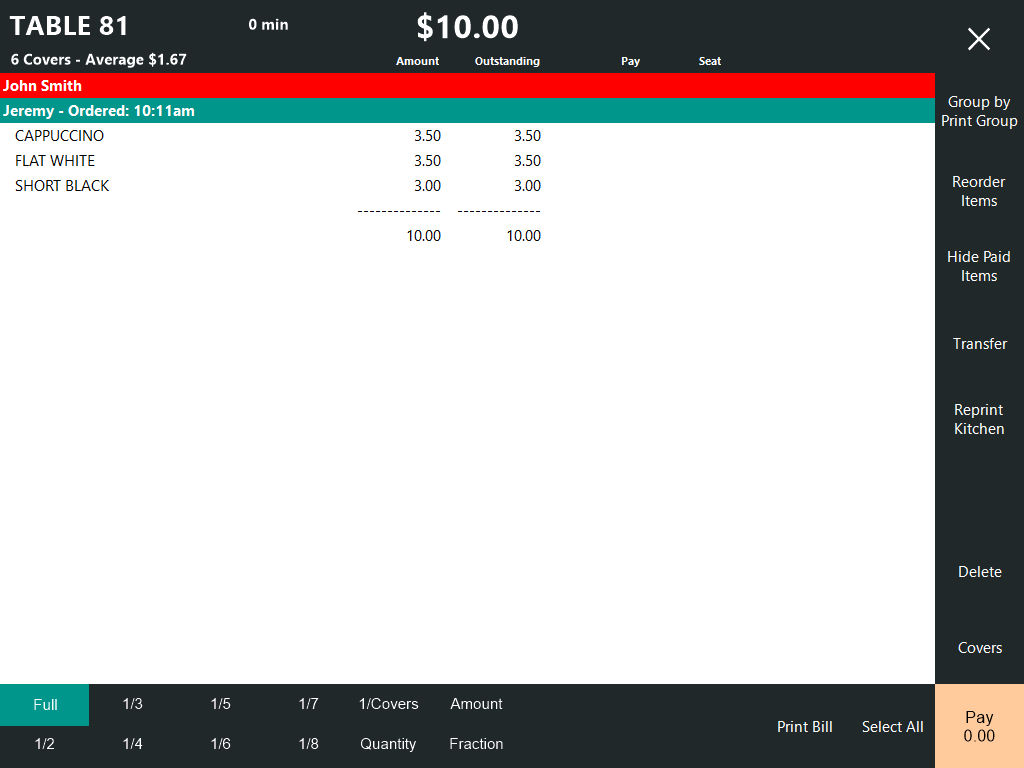
The Table Details window will appear with the items that have been transferred from the Pending Sale.
Pressing the Email button will trigger an Email window to appear, which will be pre-populated using the customer's email address, the Subject line will be pre-populated with the venue's name, followed by the number of the Order.
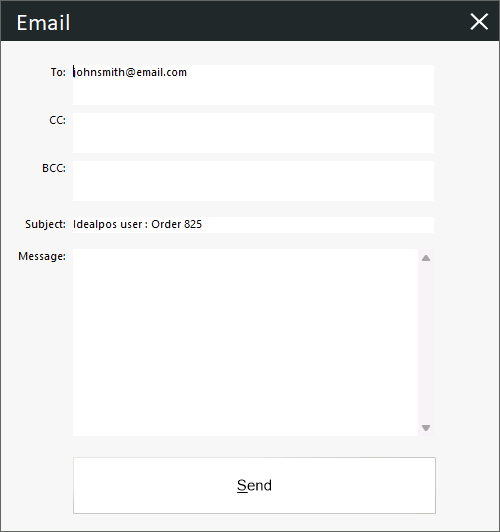
After the email is sent, a confirmation prompt "Email was sent successfully" is displayed.

The customer will receive a copy of the email which will include an attached PDF file of the Pending Sale (the appearance of the PDF is the same as the Windows Print of the Pending Sale - Refer to the Windows Print option above for an example).
After the Kitchen Reprint button is pressed, any Stock Items that are configured to print to the Kitchen Printers will be reprinted to the Kitchen.
The below is an example of a Kitchen Reprint.
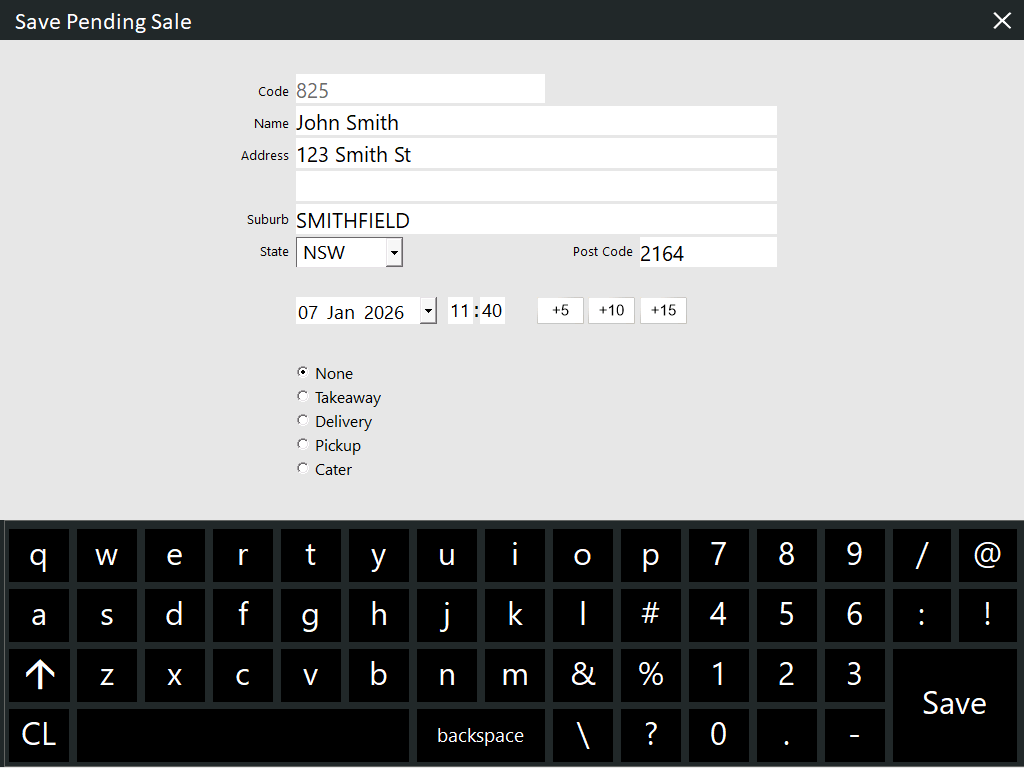
Pressing the "Modify" button will display the "Save Pending Sale" window, which can be used to modify the details of the Pending Sale.
Pressing the "Delete" button will trigger a confirmation prompt "Are you sure you wish to Delete?".

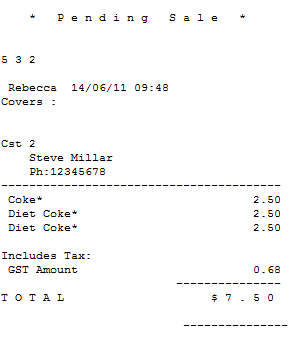
Pressing the "Print" button will trigger a printout of the Pending Sale to be printed to the Receipt Printer.
After the "OK" button is pressed, the Pending Sale will appear on the POS Screen, ready for adding items or finalising.